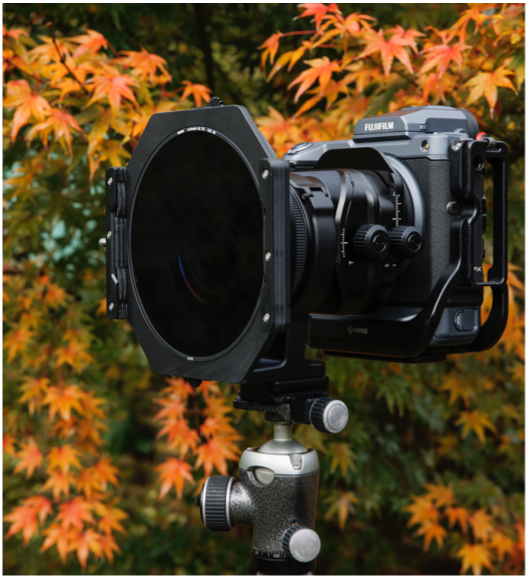
A review of the NiSi S6 filter system on the Fujinon GF30mm f5.6 T/S
Back in September, ahead of the release of the new Fujifilm 30mm tilt shift lens, NiSi kindly sent me a set of filters compatible with the mammoth filter thread size of 105mm.
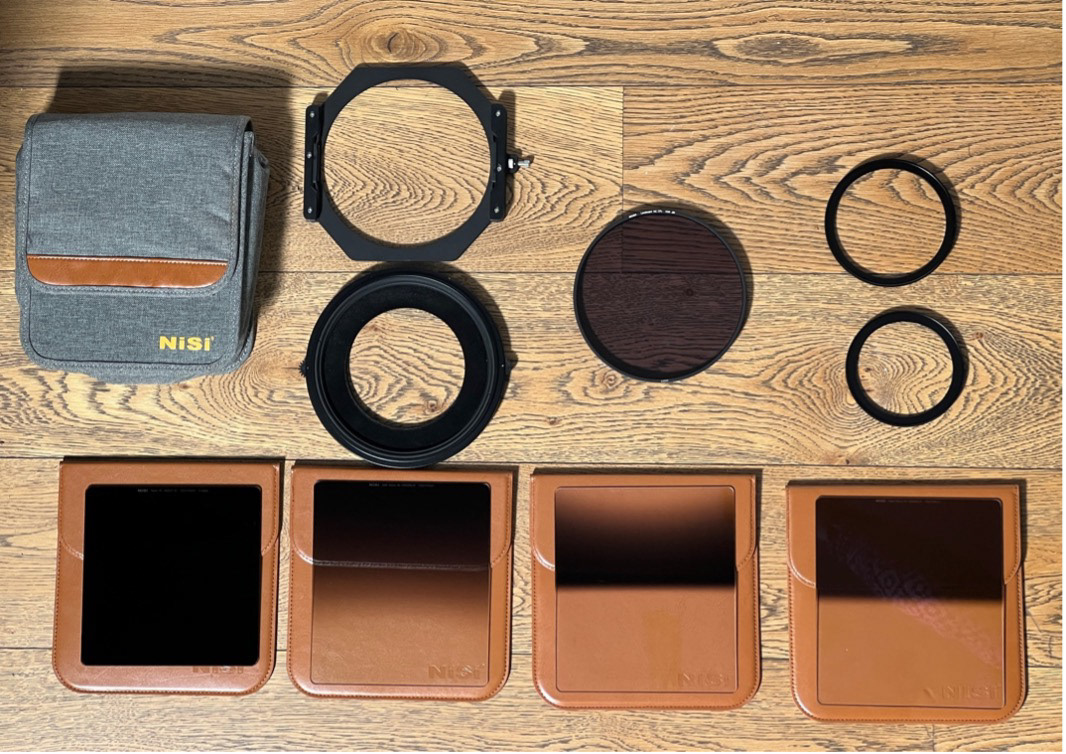
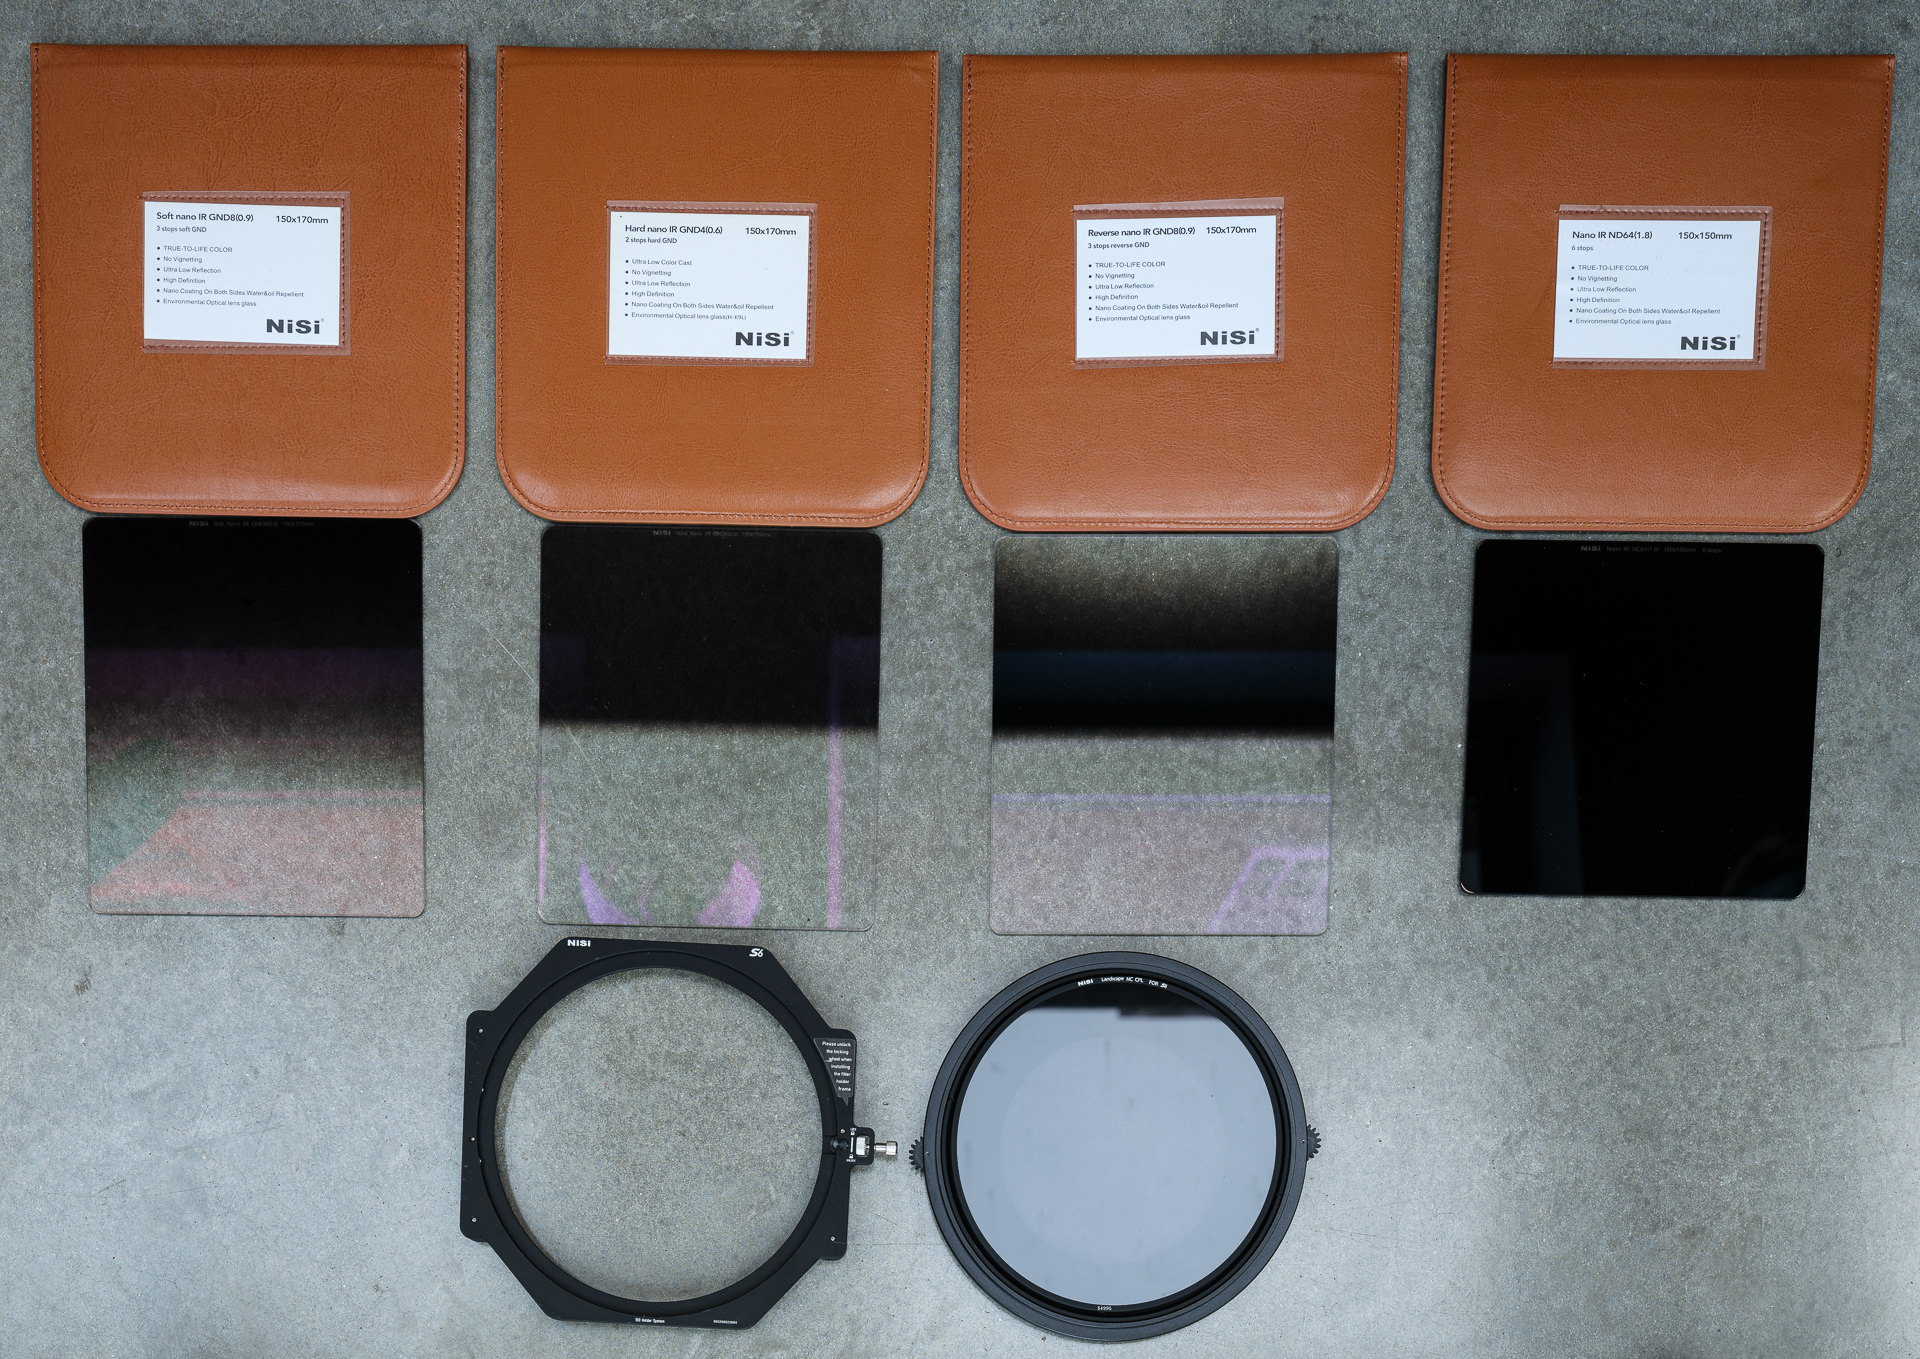
The S6 kit used included:
The filter holder
A 3 stop soft graduated neutral density filter (3 stop soft GND)
A 3 stop reverse graduated neutral density filter (3 stop reverse GND)
A 2 stop hard graduated neutral density filter (2 stop hard GND)
A 6 stop neutral density filter (6 stop ND)
A circular polariser (CPL)
A set of adaptor rings
I had already taken the 100mm filter system around the world with great results (see below) so I knew what to expect in terms of image quality:
NiSi 6 Stop ND + 2 stop soft ND + CPL

NiSi Reverse 3 Stop ND Grad
NiSi CPL
I had to wait until early December to receive one of the very first copies of the Tilt Shift Lens available in the UK, so please keep in mind the very limited time I have had to put this review together!
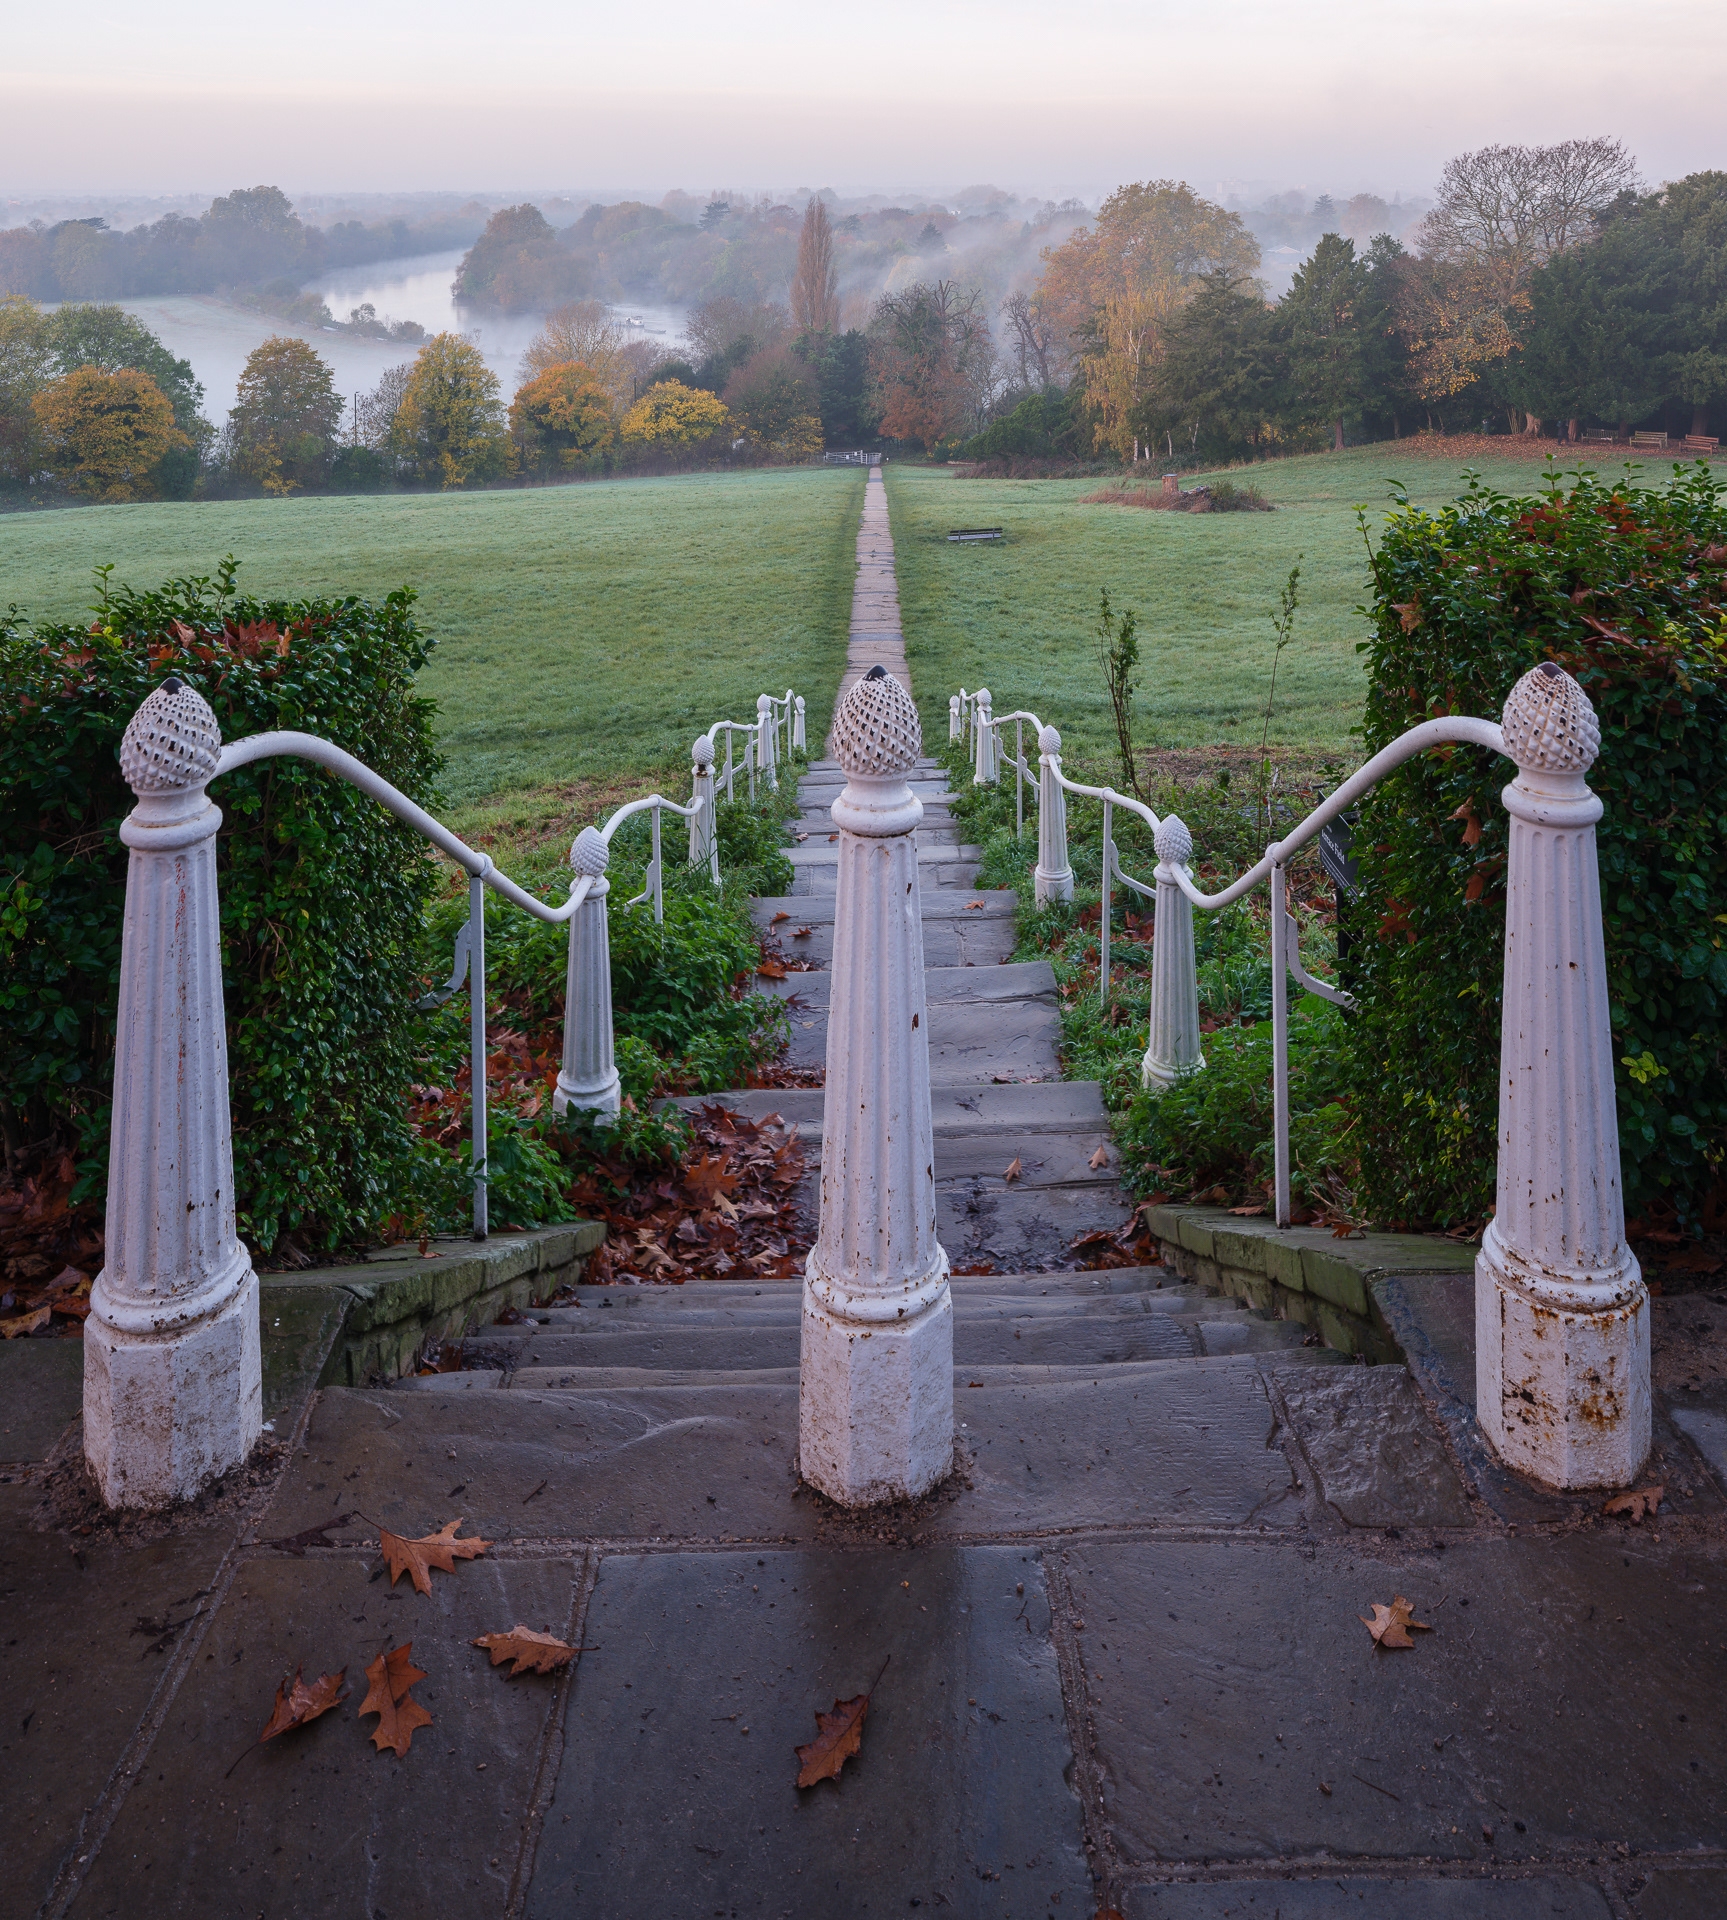
My first outing was in my local area of Richmond, London. I wanted to make the most of the shift ability of the lens to lay the focus plane along the path down one of the most picturesque viewpoints.
The foreground was in the shade as this was taken before sunrise, the skies were bright and there was heavy glare from the dew on the ground. The NiSi Landscape CPL blocked all stray light into the lens, removing the glare and cutting through the haze in the sky, greatly increasing saturation and contrast. The NiSi 2 Stop Hard Graduated Neutral Density Filter allowed me to bring the sky exposure down to match that of the foreground for a balanced image.
No filter

NiSi 2 Stop Hard GND + CPL
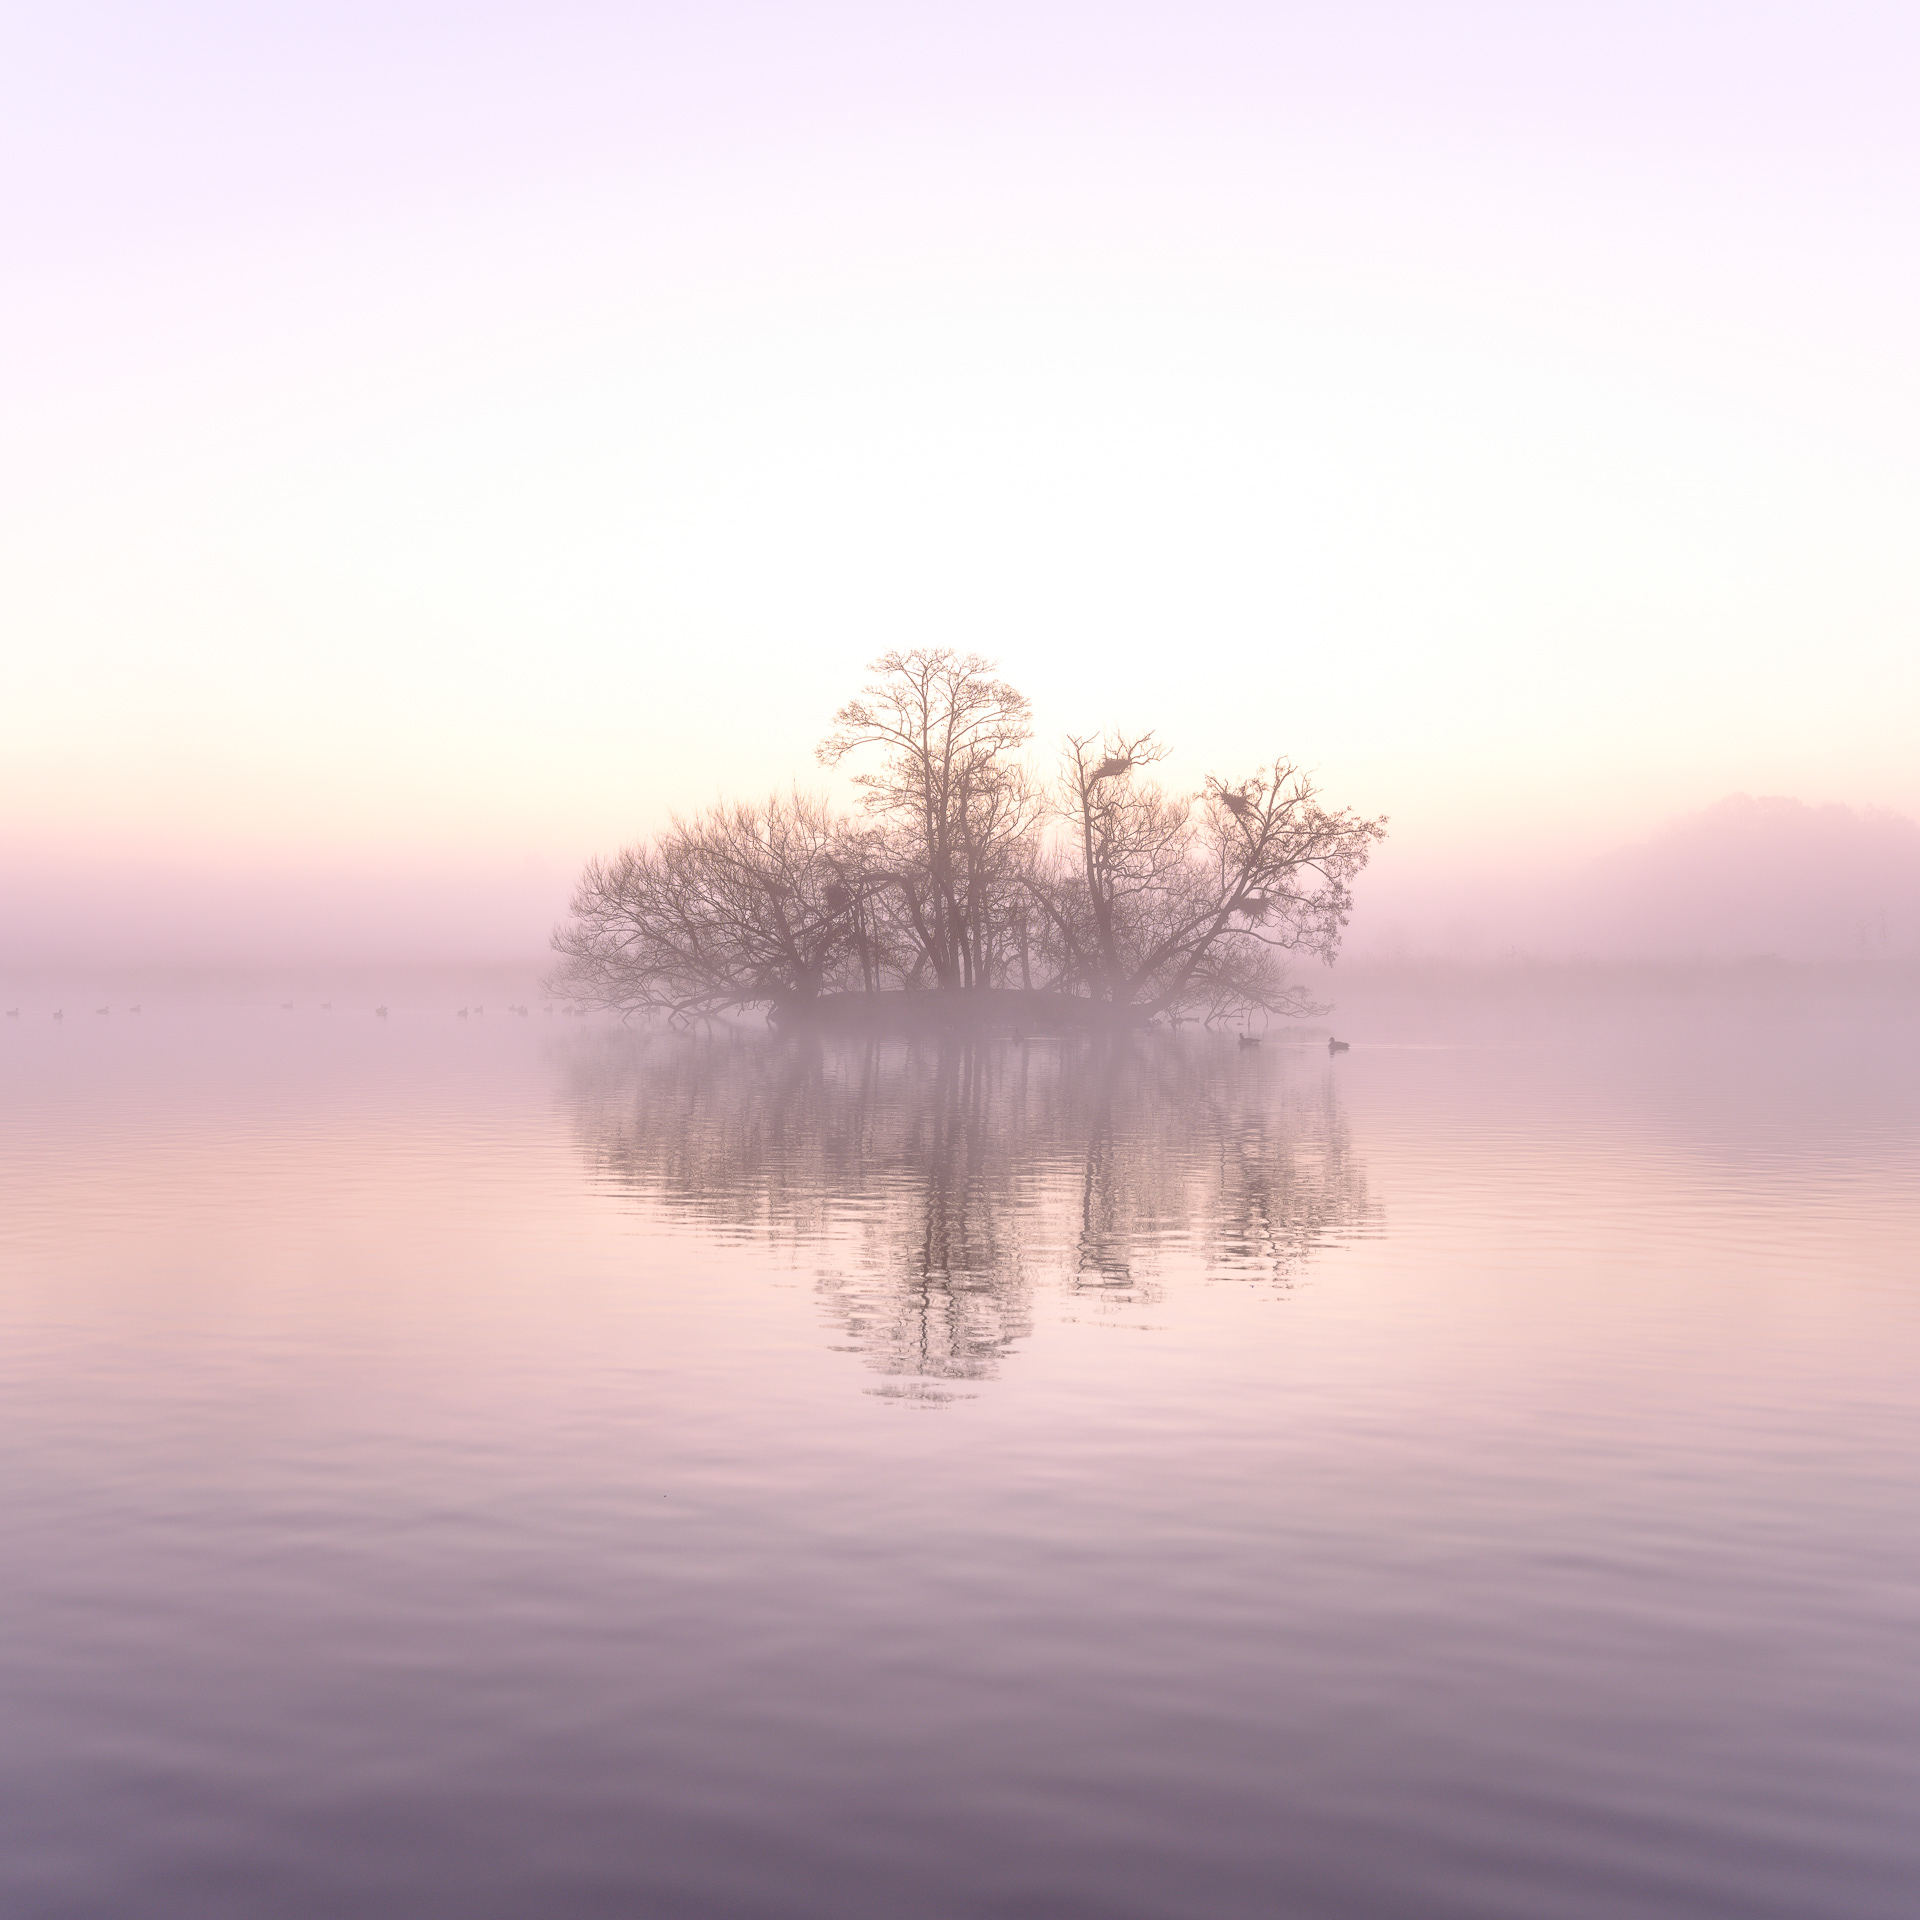
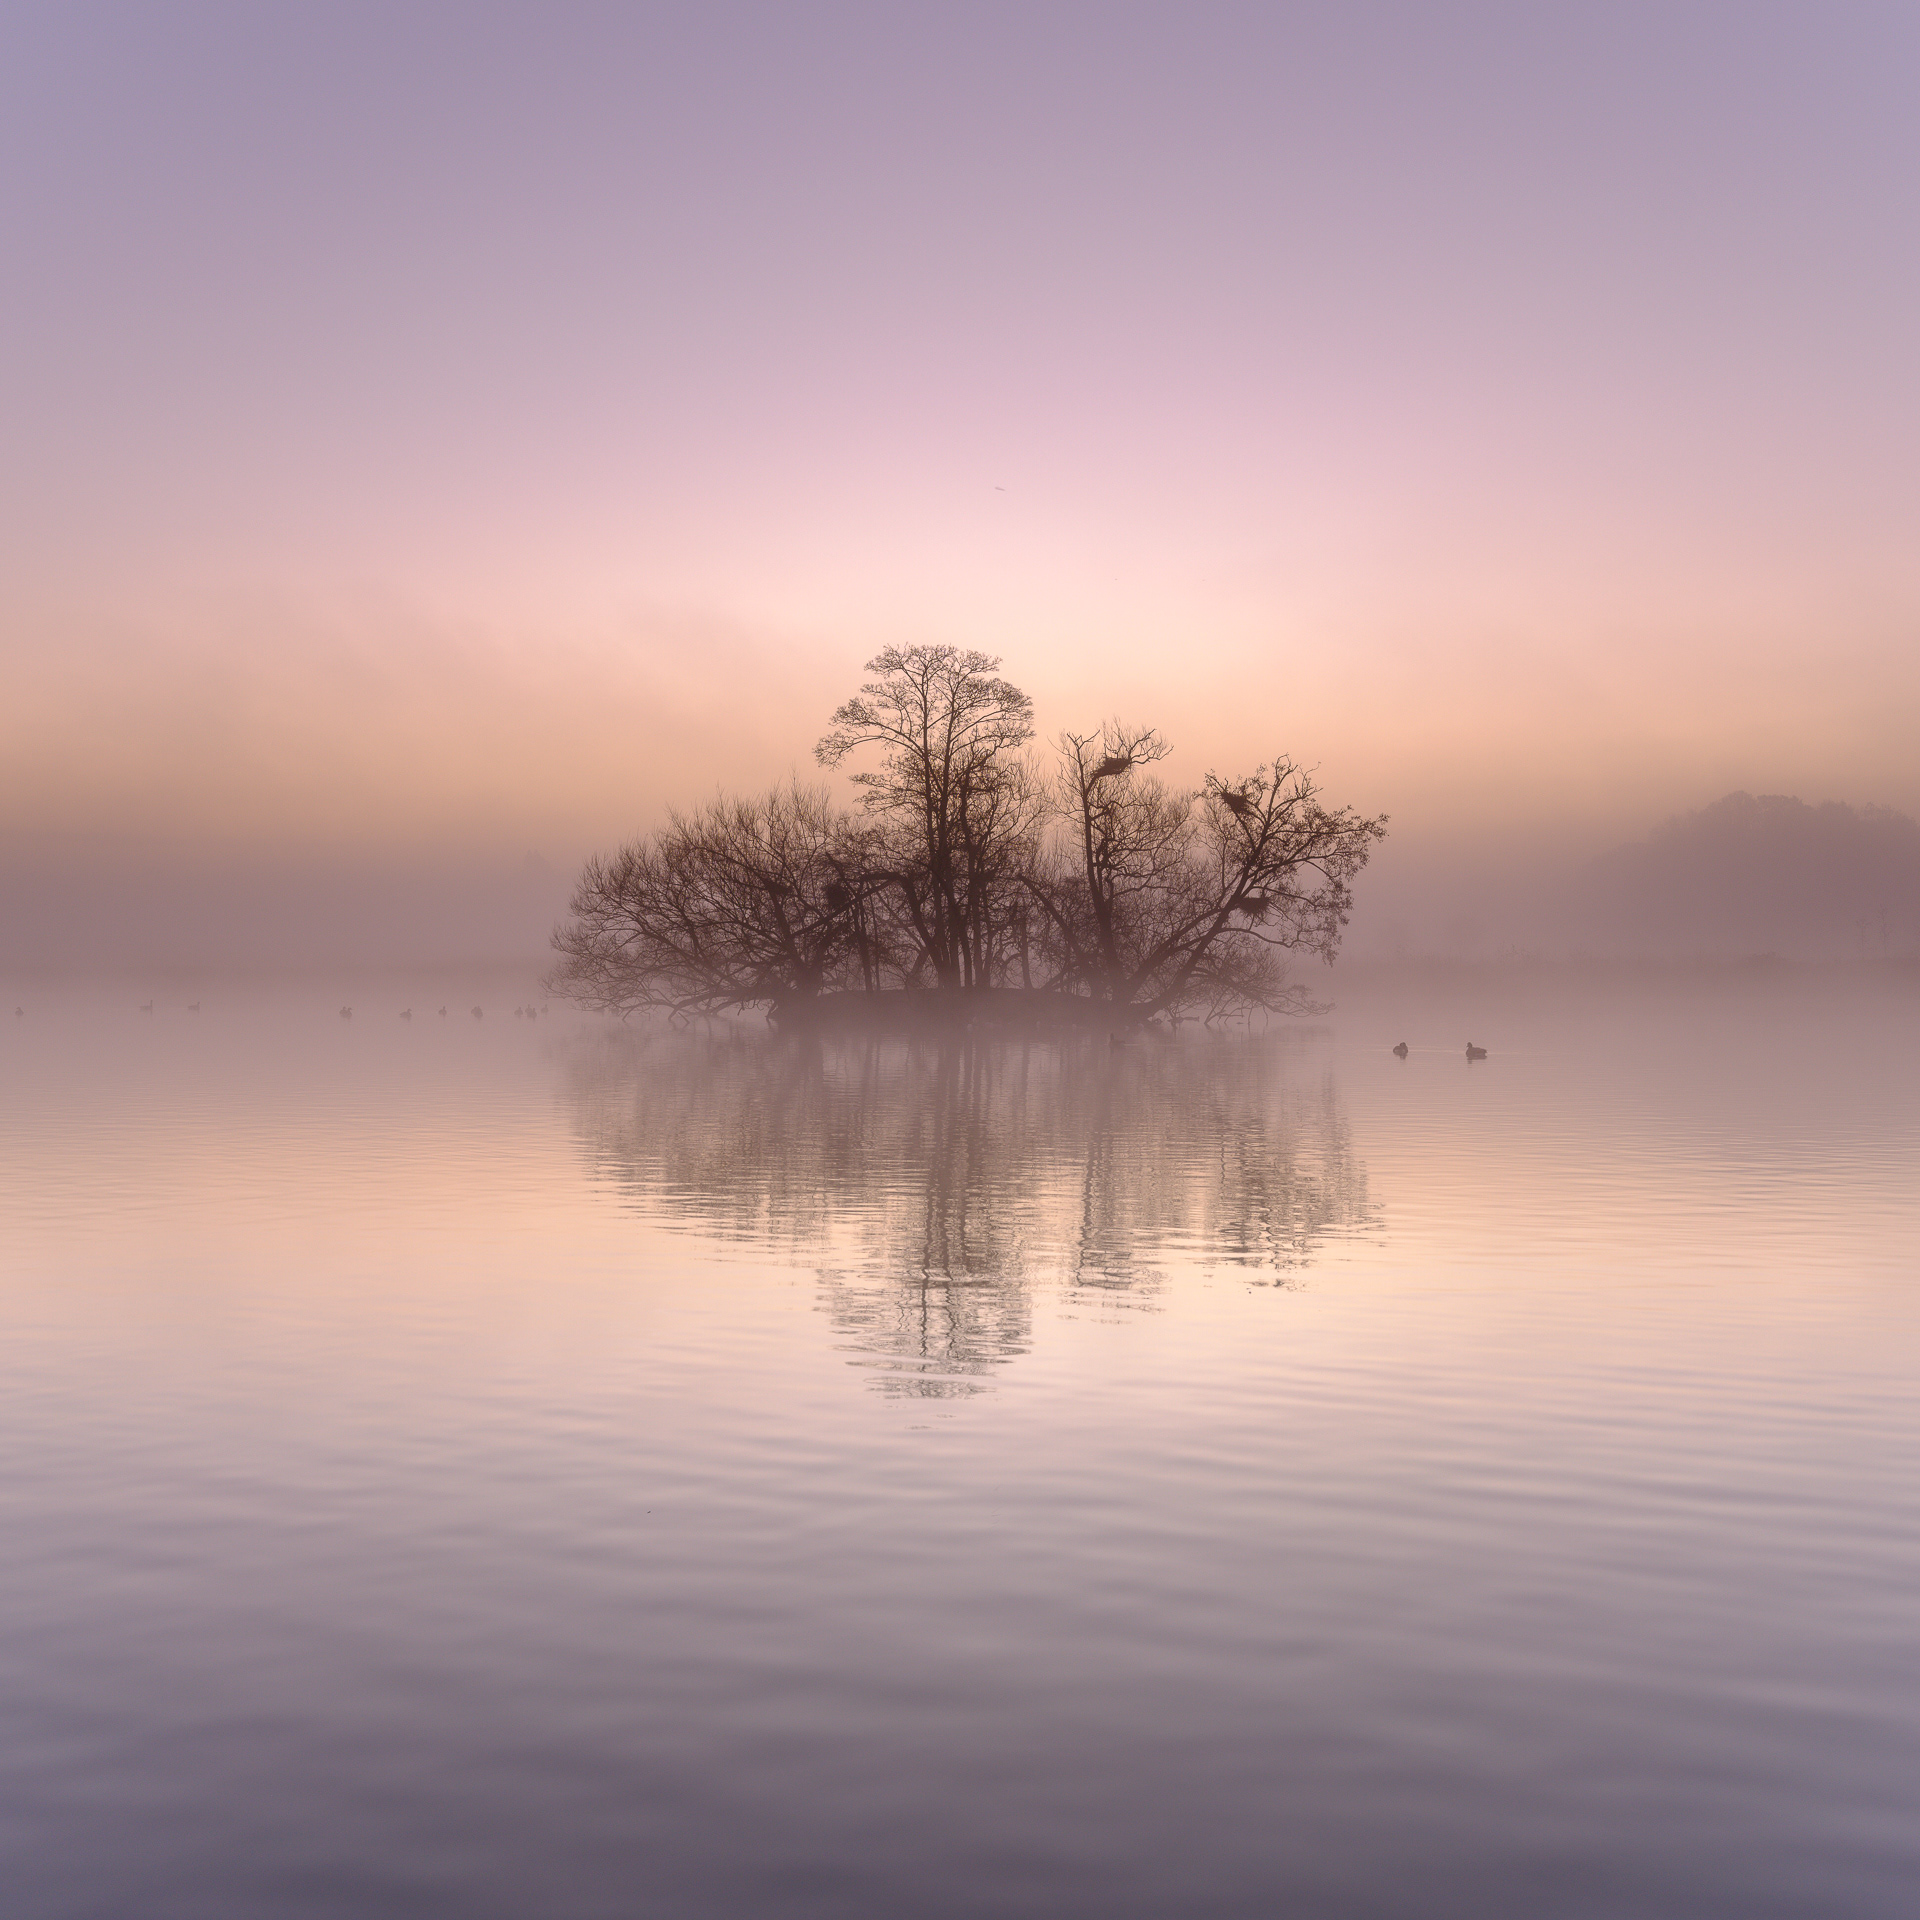
The next morning, I headed to one of my favourite area in Richmond: the Lower Pen Pond in Richmond park.
There is a very photogenic island in the middle of the pond which makes for a great subject on a misty morning.
I waited for the sun the be just below the horizon to take the shot.
Here, I opted for the NiSi 3 stop soft graduated filter as my subject was above the horizon line and I didn’t want an apparent, defined black line on it. It helped me bring down the skies to the same luminance level as the foreground, balancing the exposure straight in camera.
No filter
NiSi 3 stop soft GND
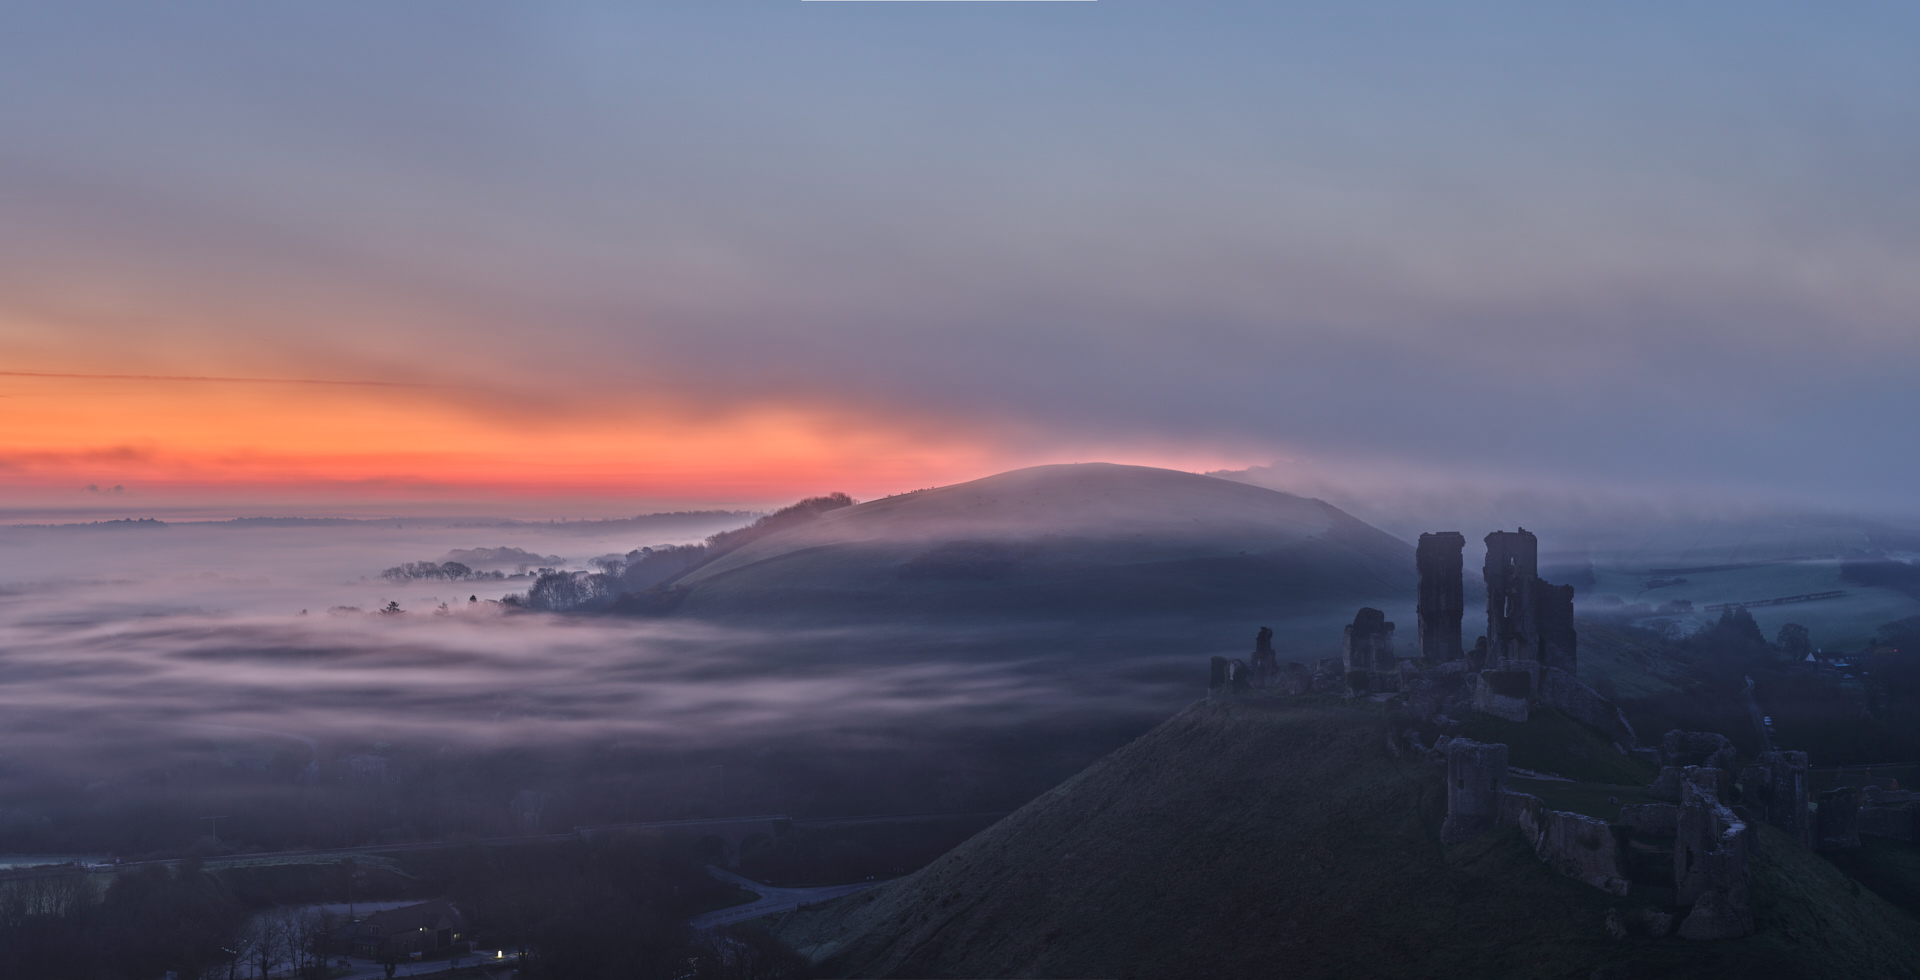
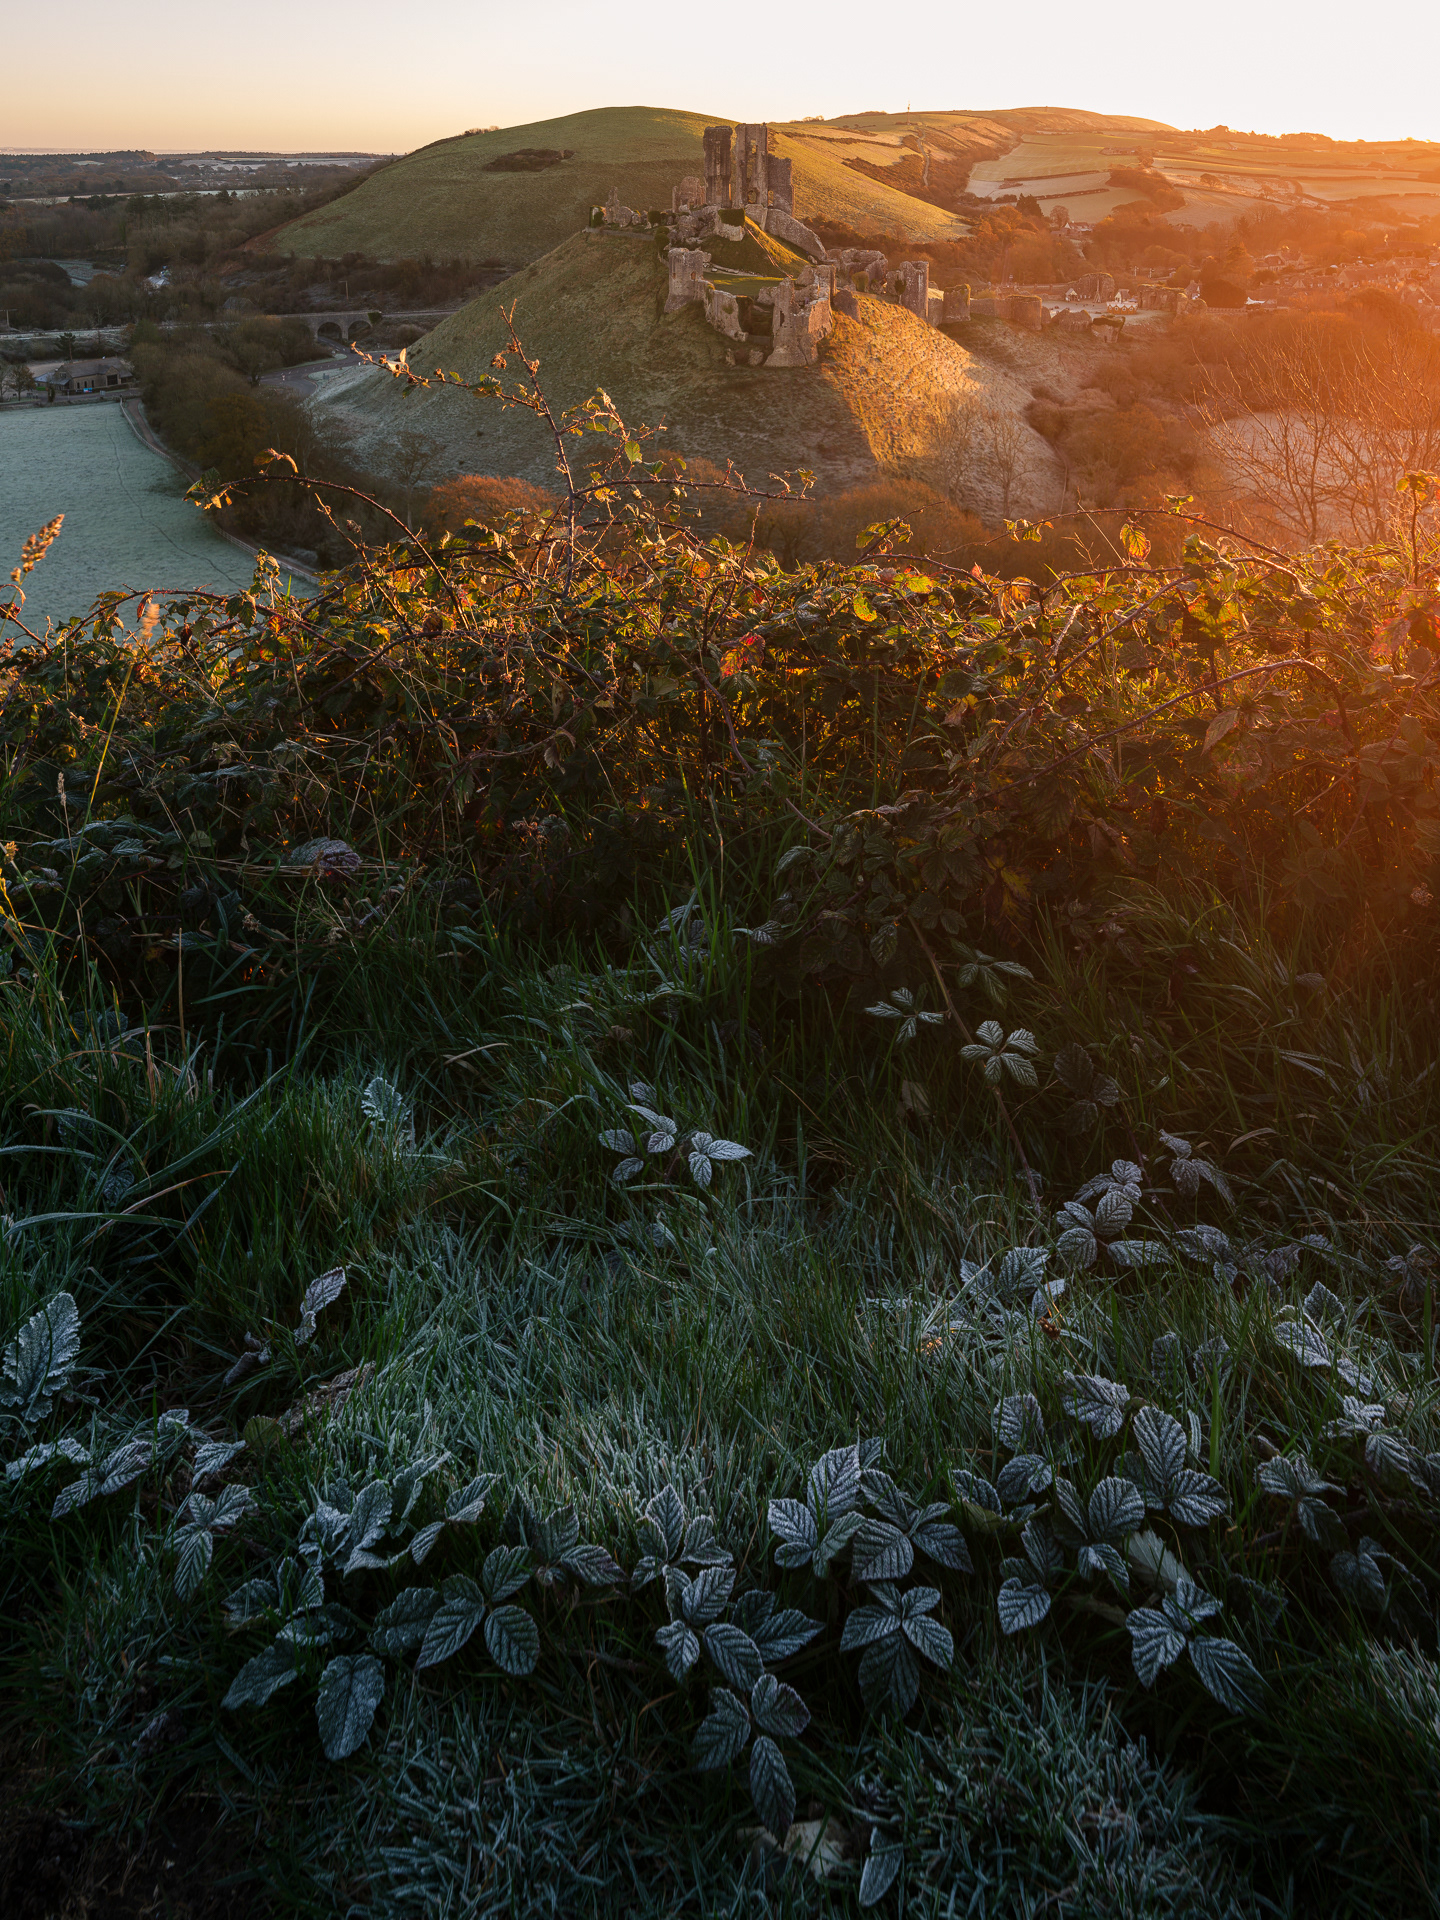
Later in the month, I travelled down to Dorset in the hope to revisit a photograph of Corfe Castle in the mist I took back in April (see below, using the GF 110mm / 3 shot pano)
NiSi 2 stop hard GND
Unfortunately, the weather that day was very dry and there was no mist in the valley. Thankfully I spotted some frost on the thorns and composed a shot with the castle in the background, using the tilt function to my advantage. Here the NiSi 2 stop hard graduated neutral density filter allowed me to keep the amber colour of the sky without bracketing.
No filter

NiSi 2 stop hard GND
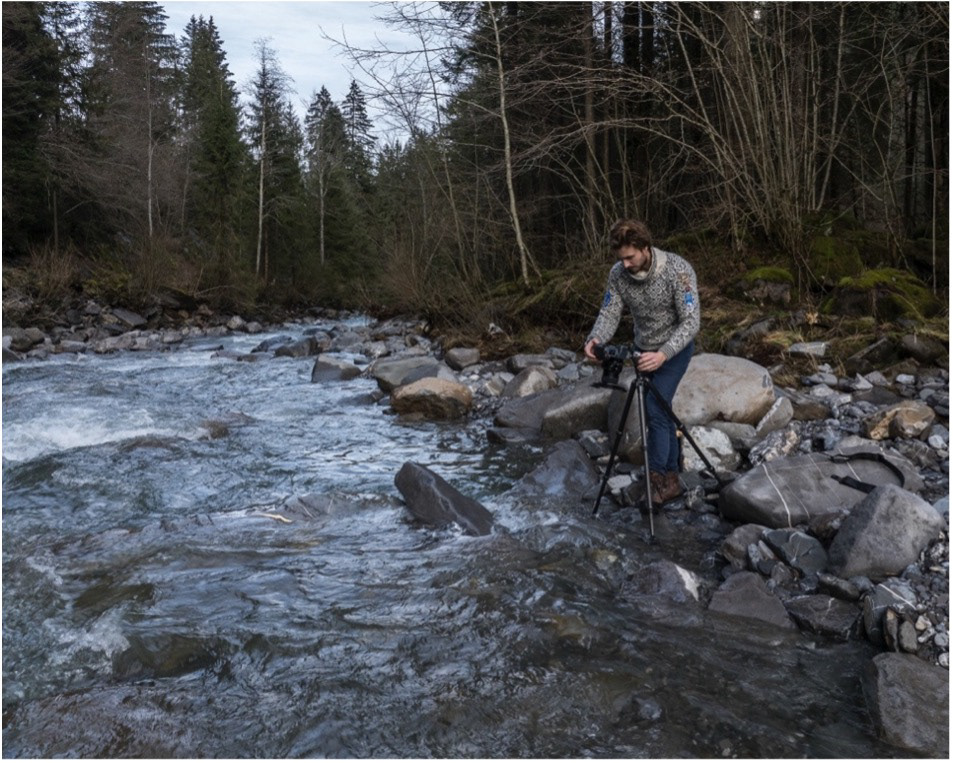
December 2023 in the UK was shocking from a weather standpoint, so I did not get any other opportunity to take the lens out until I flew to Switzerland for holiday.
Here I knew I would find some perfect candidates to use the 6 stop ND filter more.
Contrary to Graduated Neutral Density Filters, normal Neutral Density filters act as “sunglasses” for your lens and allow you to dramatically increase exposure times, opening up creative possibilities with anything that moves in the frame.
I tend to use plain NDs for seascapes, but they also work well for streams and waterfalls.
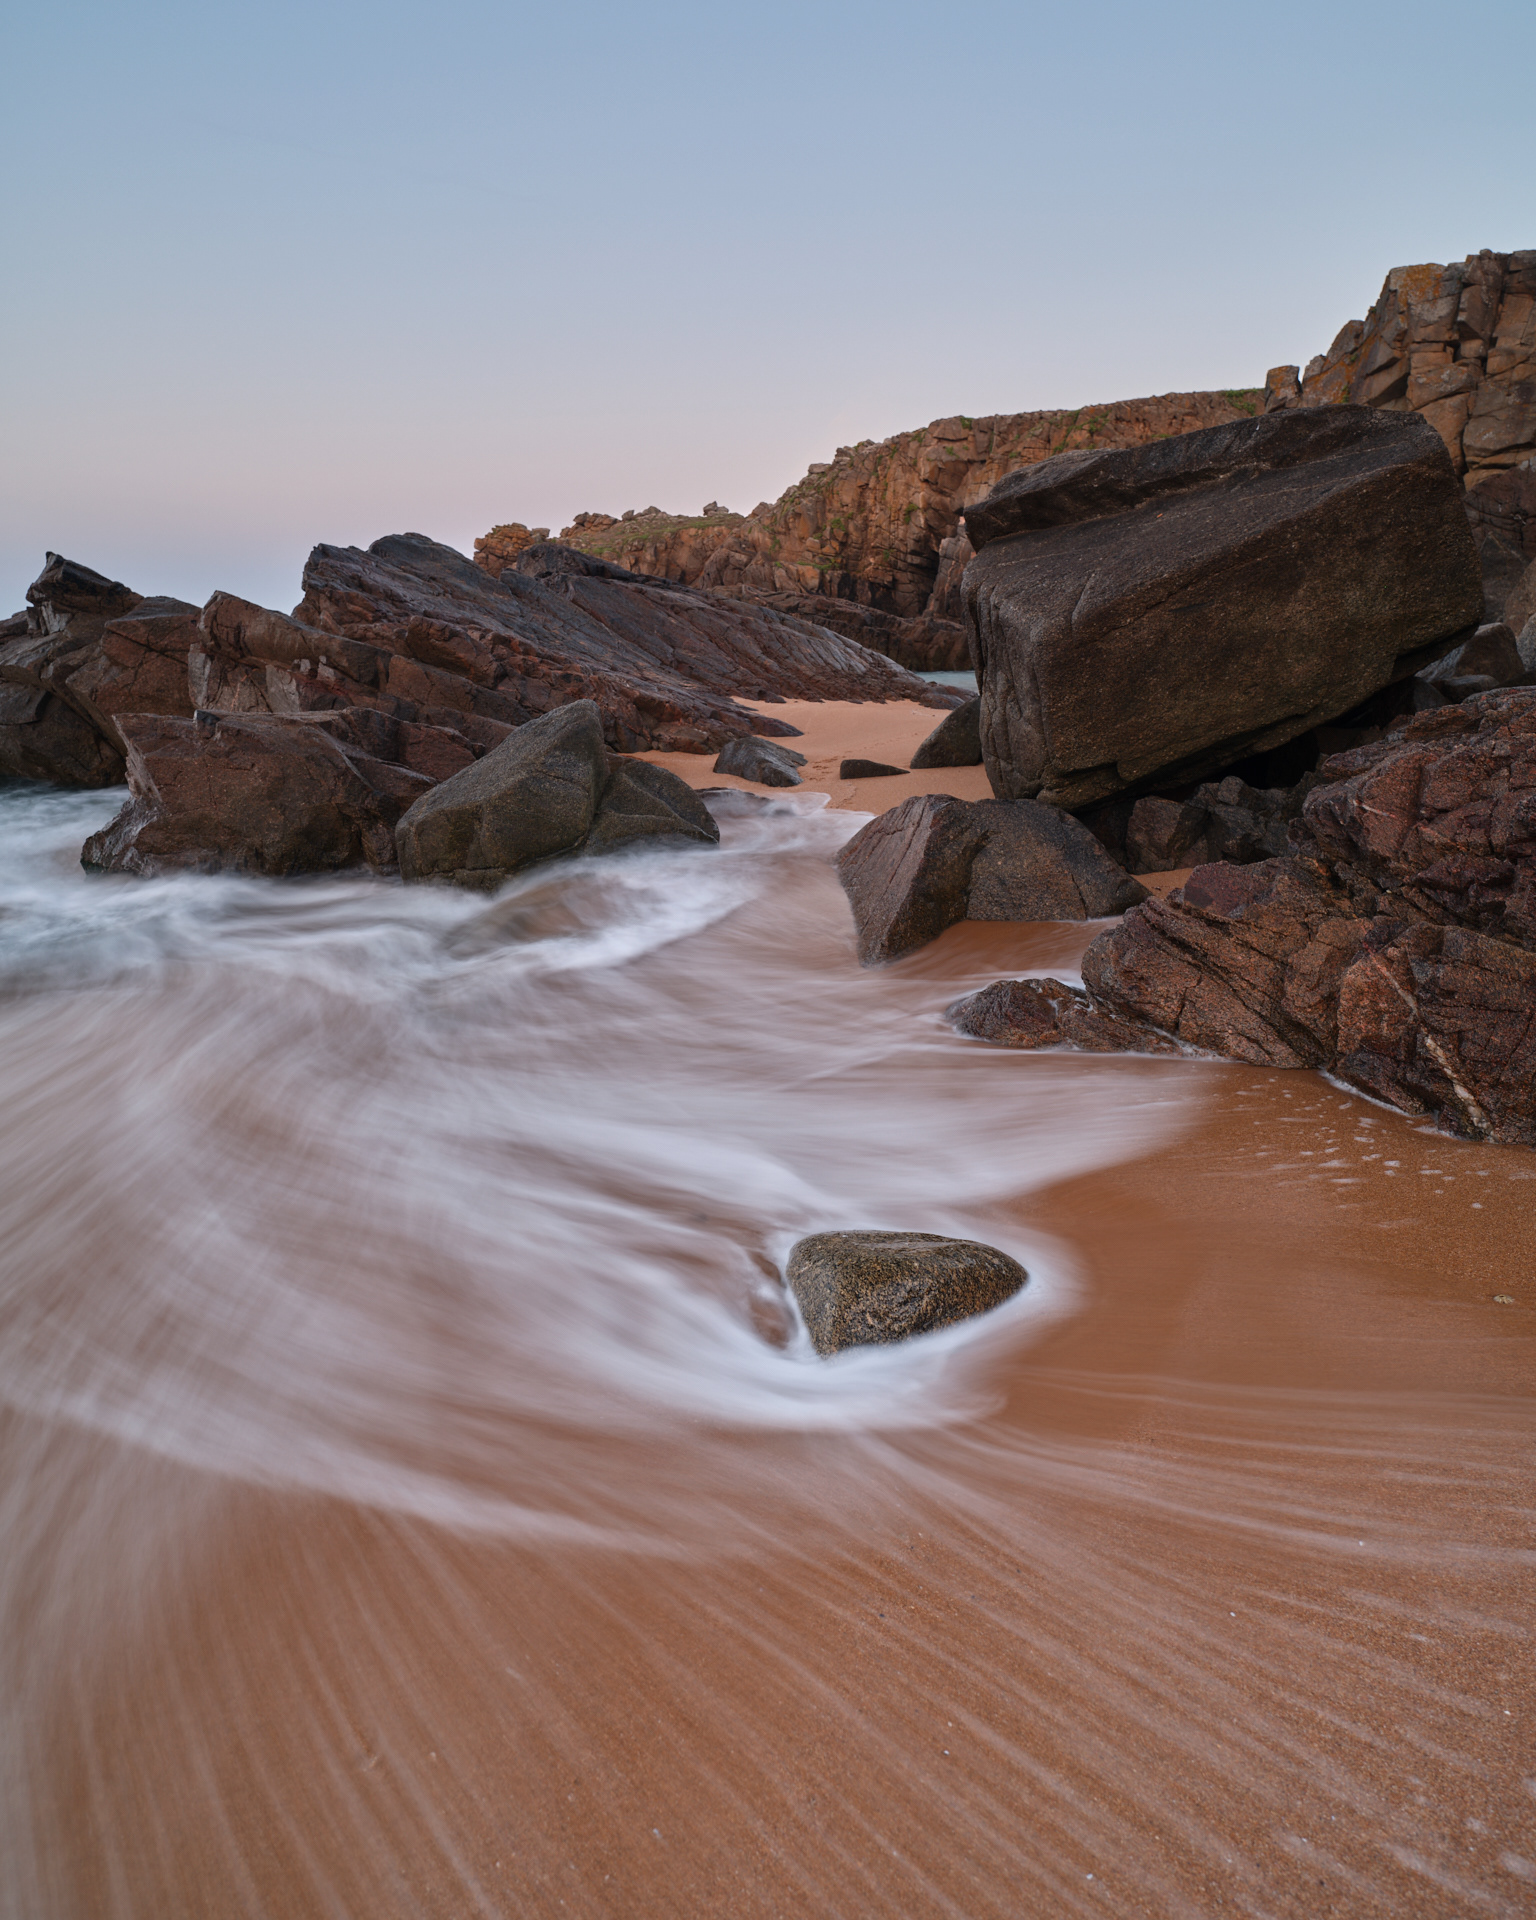
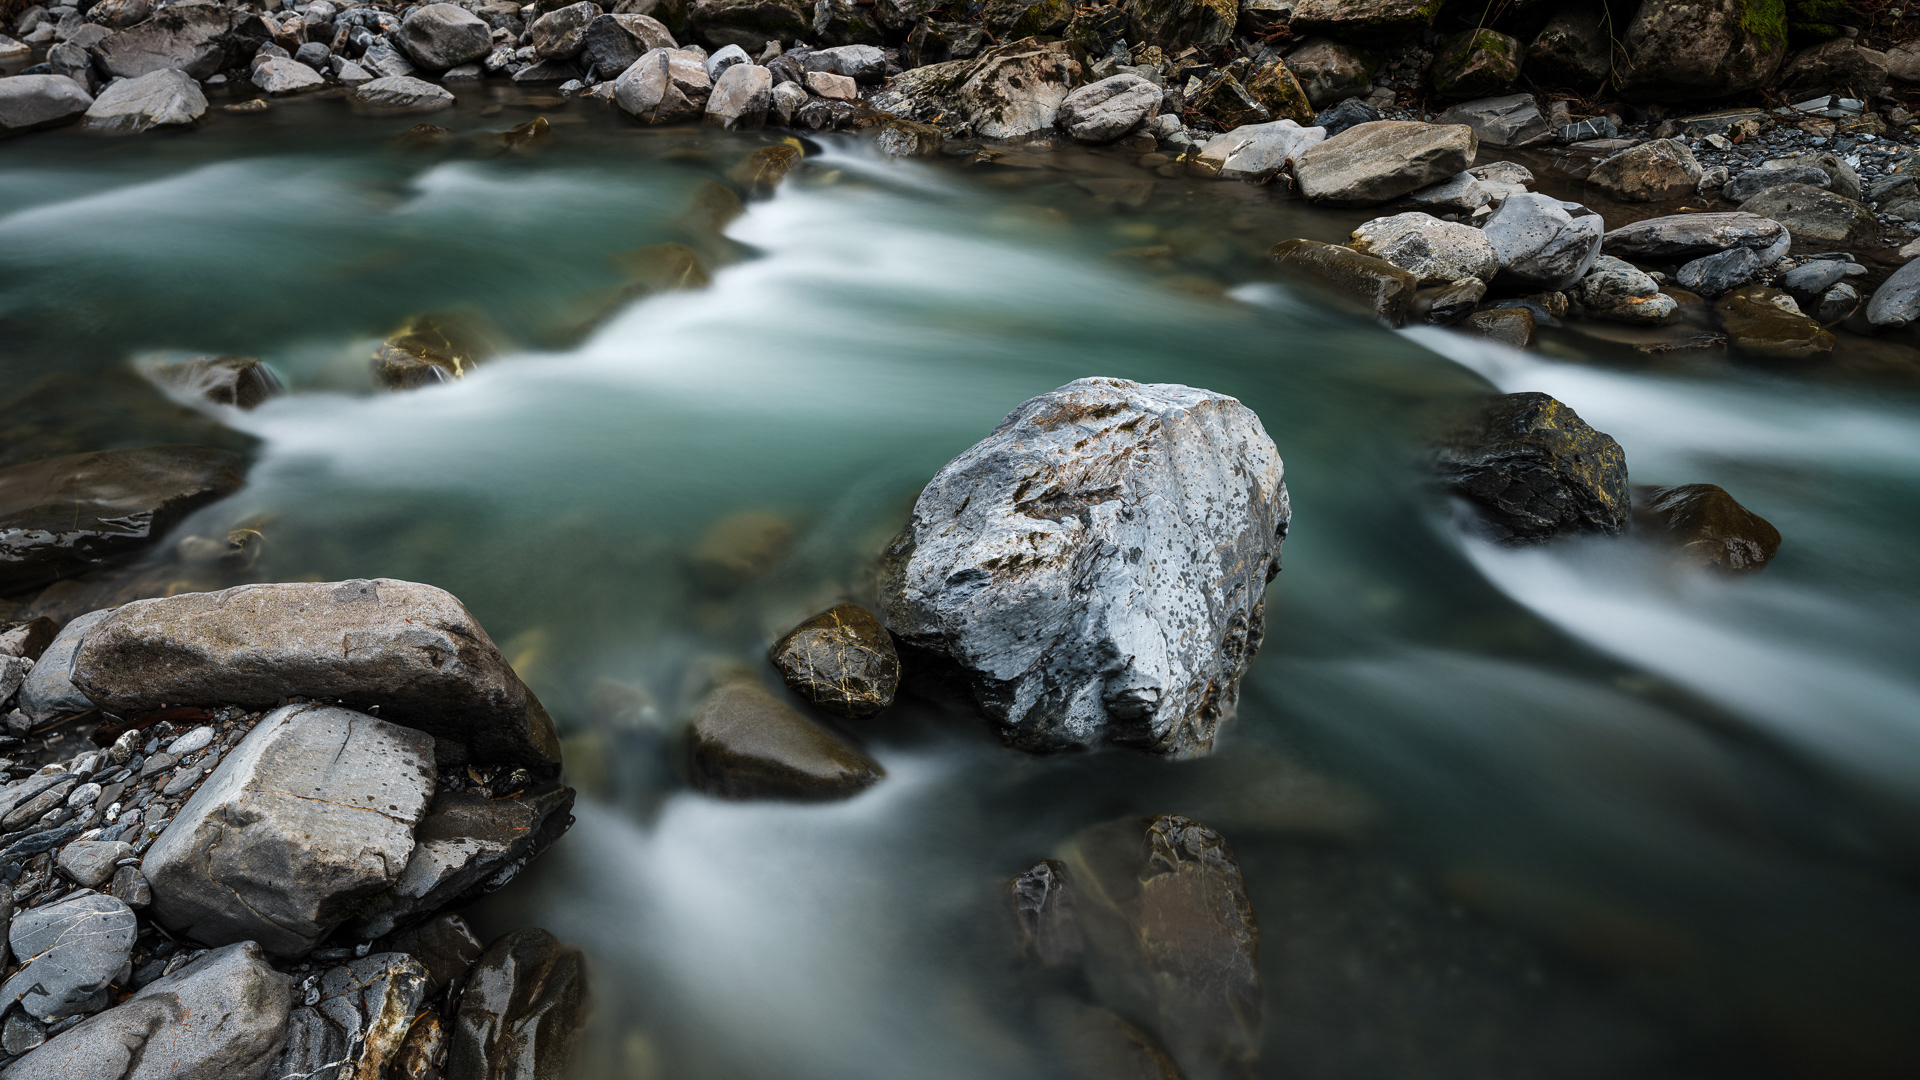
I found this composition centred around this main boulder down in the valley in the Swiss Alps.
I placed the plane of focus along the three rocks using a little bit of tilt.
The NiSi ND combined with the CPL allowed me to slow things down and cut the glare in the water.

No filter
NiSi 6 Stop ND + CPL
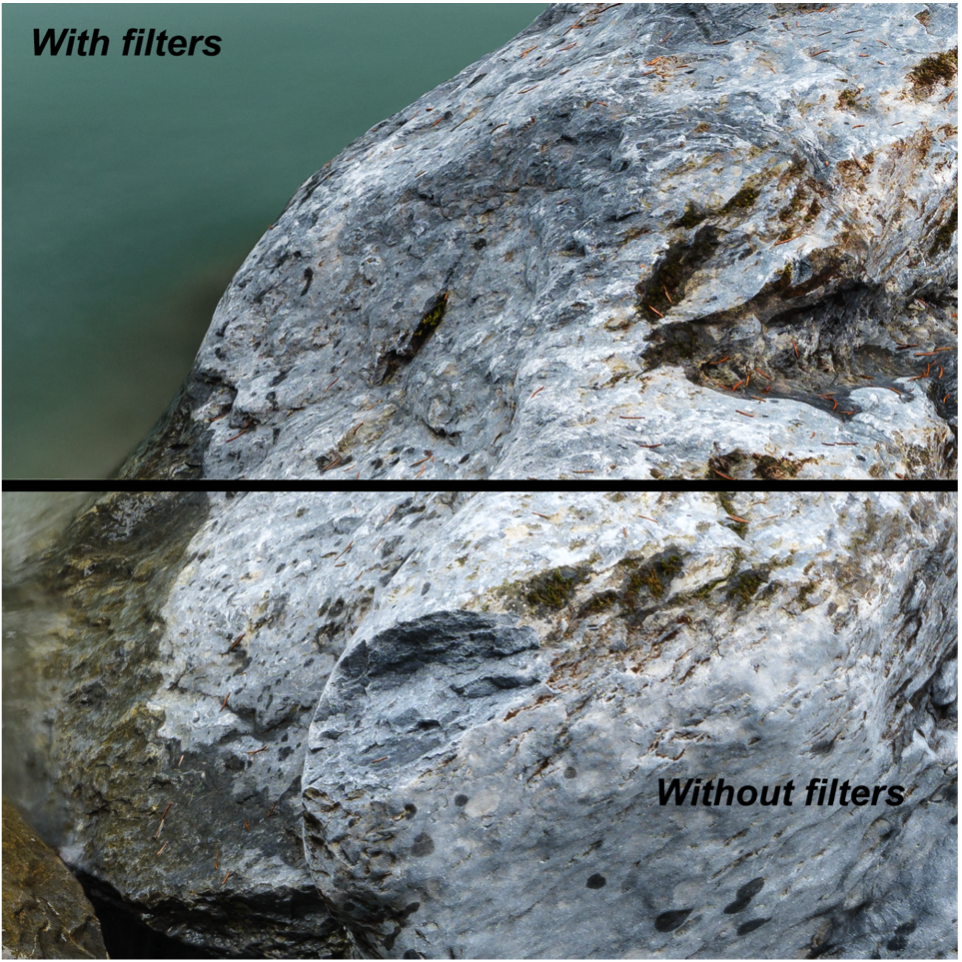
Looking at a very cropped-in sample of the central boulder, it is easy to see how the high-quality glass used in NiSi’s filters does not affect the overall sharpness, even of one of the sharpest lens of one of the highest quality digital medium format bodies available today.
Looking at a very cropped-in sample of the central boulder, it is easy to see how the high-quality glass used in NiSi’s filters does not affect the overall sharpness, even of one of the sharpest lens of one of the highest quality digital medium format bodies available today.
Later that day, the light levels were already very low as I was approaching sunset but headed to a local waterfall to seek another composition.
Here I only used the NiSi circular polariser to remove the glare from the scene and boost the contrast. I did not need to use a Neutral Density filter as the combination of low light and narrow lens aperture already led to a long shutter speed.
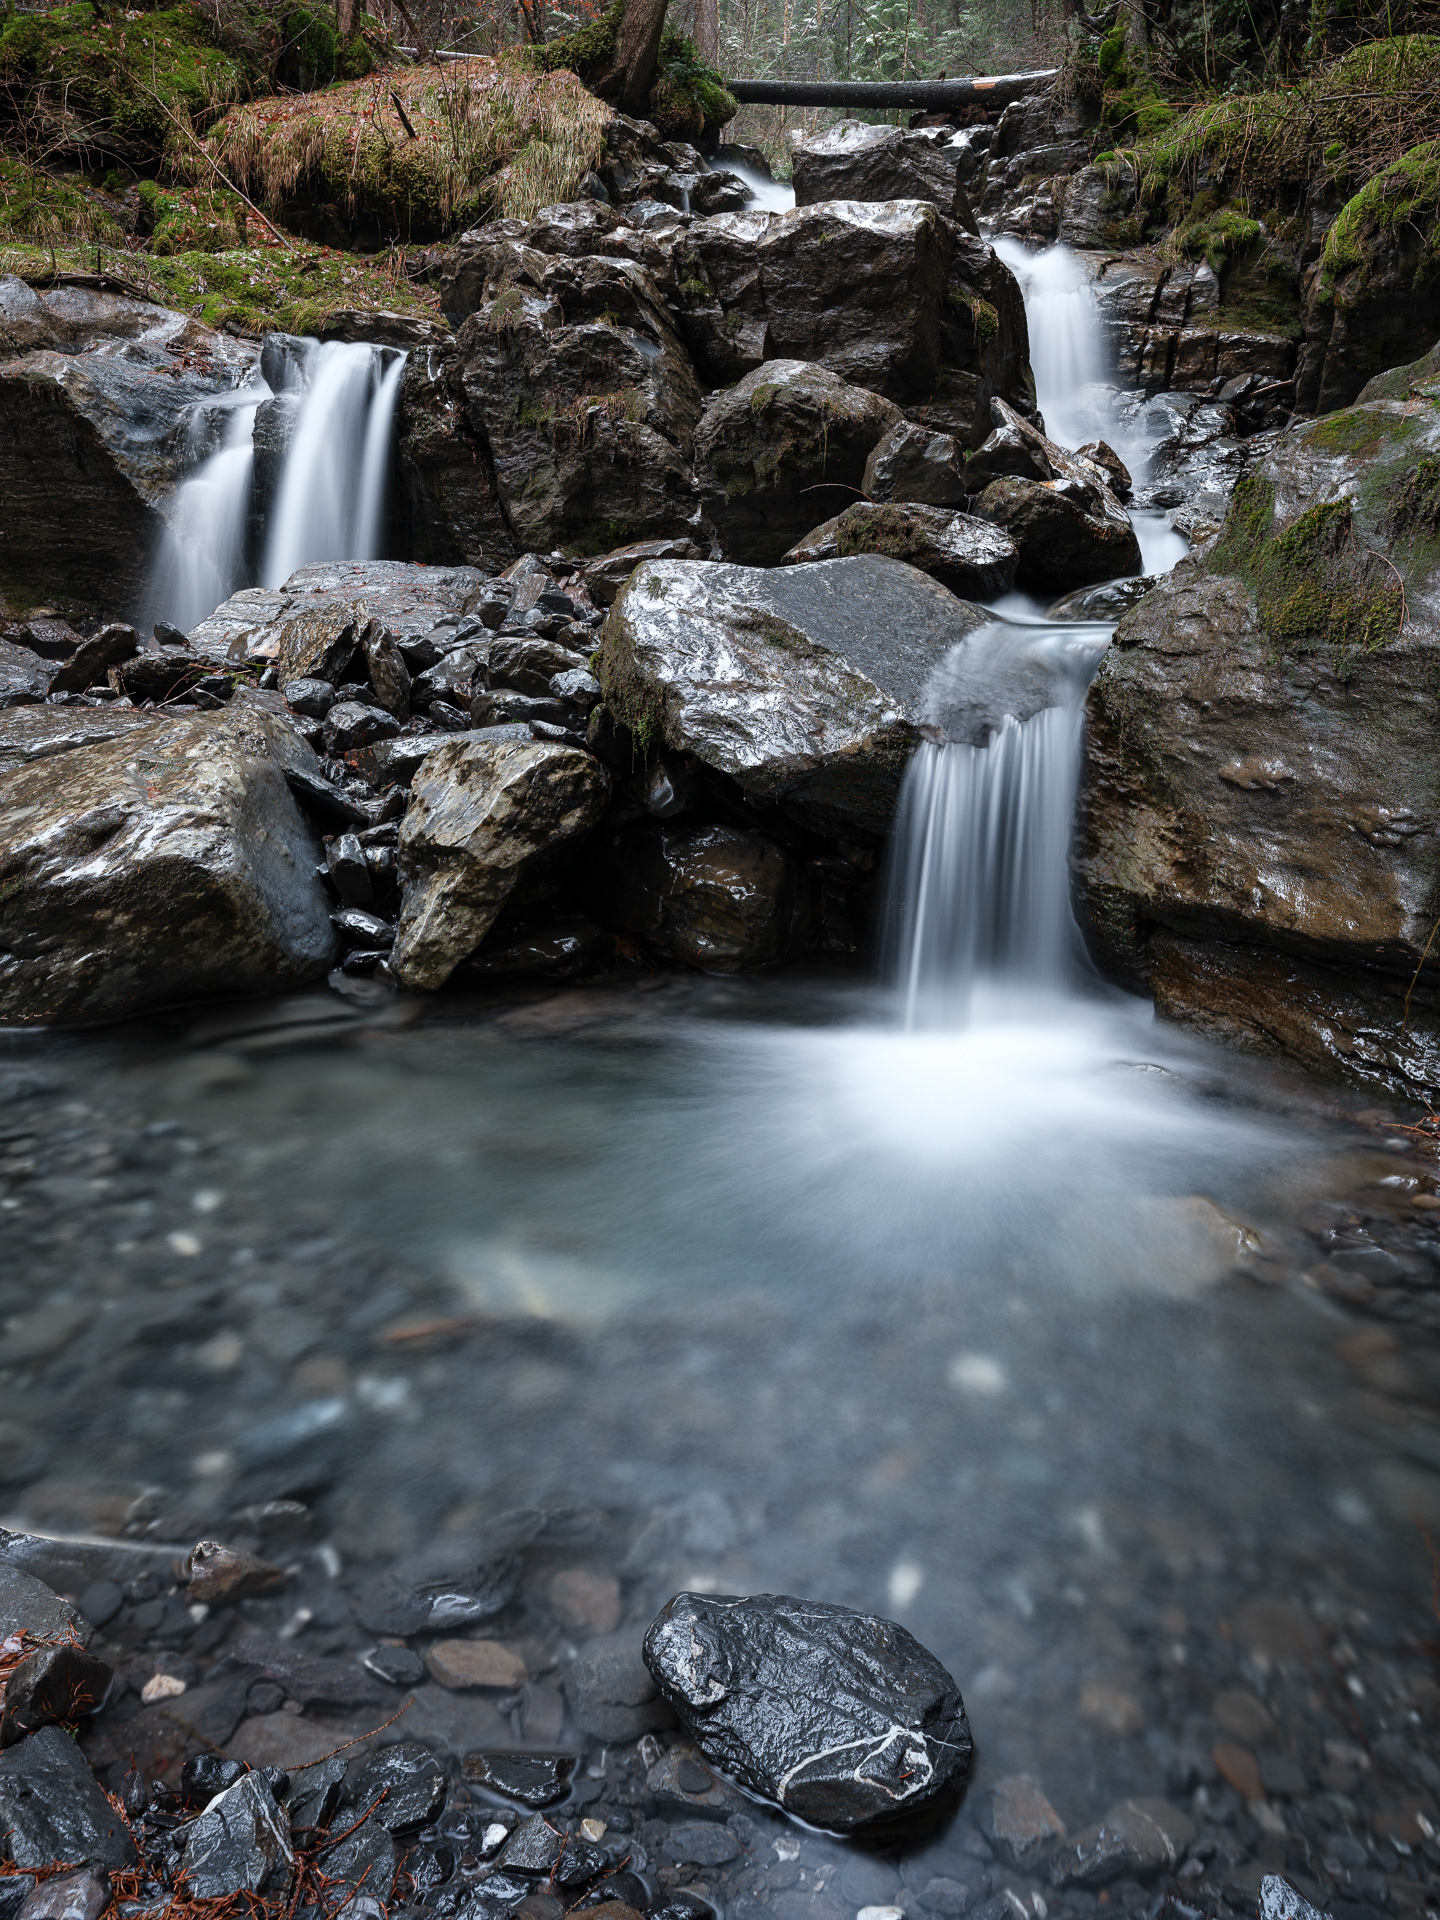
No filter
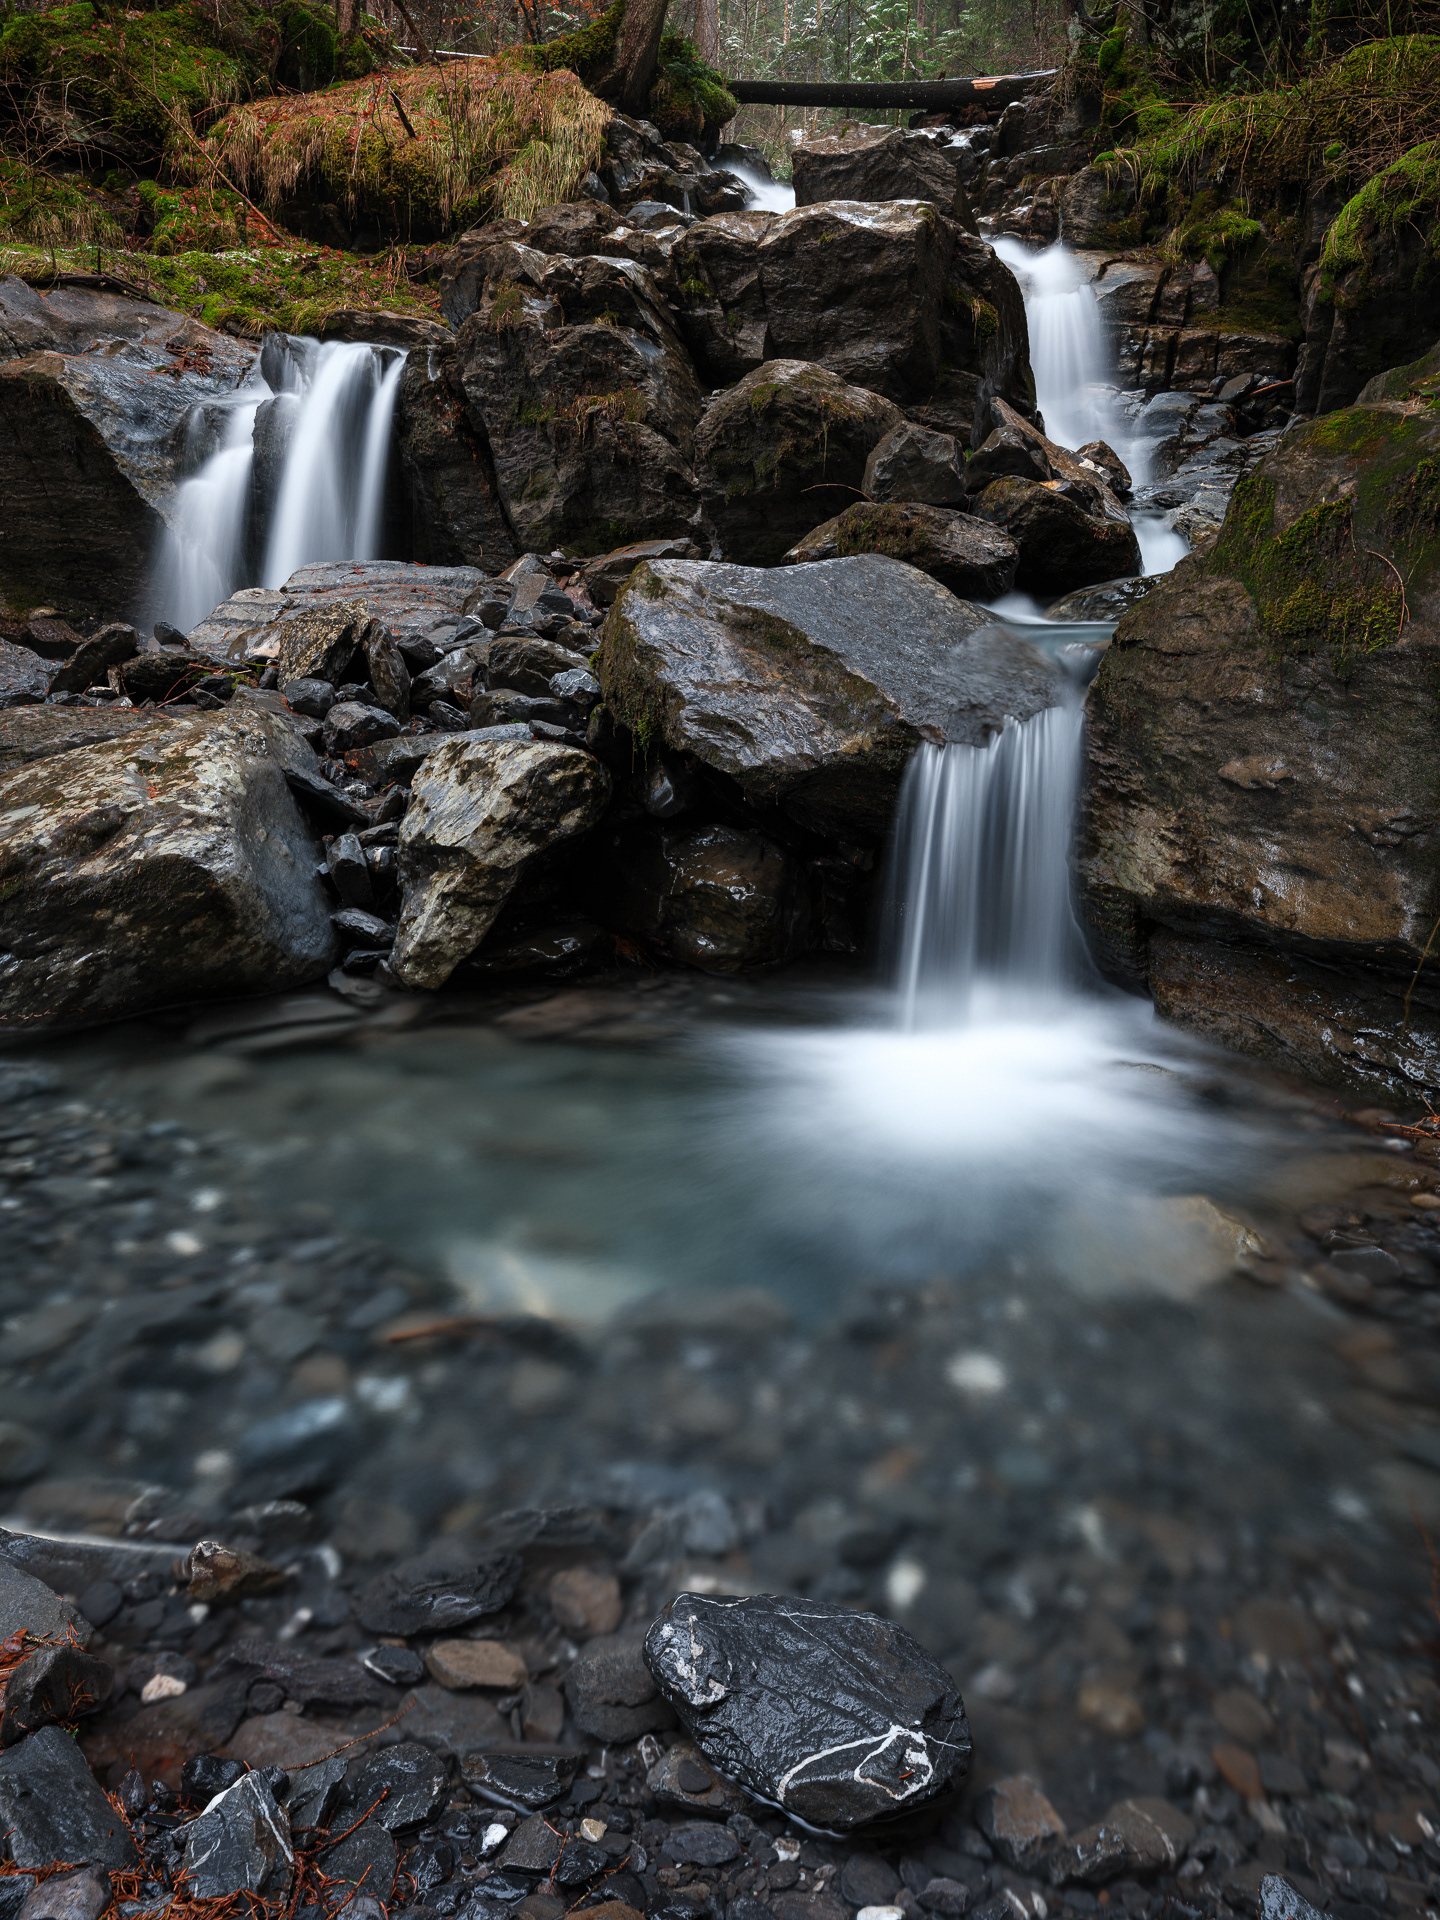
NiSi CPL
Notice how the polariser helps the viewer through the scene by hoping from waterfall to waterfall, whereas the bright spots created by natural glare in the “no filter” shot are distracting and confusing.
Conclusion:
You might ask yourself, do I really need filters when editing software are now so powerful and easy to use?
After all, it is true that, with the exception of polarising filters which you simply cannot fake/reproduce in post, long exposures and balancing of high dynamic range scenes can be done with stacking multiple images and averaging them (long exposure) or taking multiple exposures at different EV levels and blending them (high dynamic range)
But here is the thing, in an age where AI can generate the best image imaginable of any subject you can think of with the click of a button, there is something really satisfying in going back to the craft of photography.
Carefully planning and composing a shot, spending time in the field making your image as opposed to simply “taking” your images makes the process much more enjoyable and help you connect with your subject to a deeper level.
I started photography because I love being out in the wild and capturing the beautiful nature around me, not because I love spending hours behind a computer screen tweaking my files, so every second that I spend in the field making it right in camera is a second that I don’t have to spend on my computer!
Blending of exposures can also be quite tricky when things move in your frame (think about waves, wind in trees/grass/flowers etc.), which is not something you have to worry about when using filters.
With that said, what about the NiSi filters in particular?
For years I was using a local UK brand which I will not name here. The filters were made from resin, scratched easily, drastically reduced the sharpness of my images and had awful colour casts. I was made to believe that they were the best of the best because of their long-standing history in Britain.
My first introduction to NiSi filters was when I bought the smaller V6 filter system and an array of various NDs and ND grads. Everything from the quality of the filters themselves, the filter holder, the pouches and even the packaging blew me away. This was a premium proposition through and through. No longer did I have to make a compromise on sharpness or spend a long-time correcting colour casts in post which dramatically increased my use of filters in the field.
Well the S6 system is no different, apart from its huge size!
Everything works as expected and you find the same attention to detail to the holder and filters and you cannot see a difference in sharpness with or without the filters, even when using arguably the sharpest lens on the GFX system.
I am only just scratching the surface of what this combo can do, and as I said earlier in the review, I have only had a few good opportunities since receiving the kit, but I am looking forward to seeing what I can achieve with it!
In April I will be heading to Svalbard and I will bring the NiSi filter system along to capture the raw beauty of the Arctic. Be sure to follow me on Instagram/fbimages and check my NiSi story highlight for behind-the-scenes content!
See you out there,
Felix Belloin